Curious about using resin on wood floors? We explore the different types of resin, the benefits and risks of applying resin to wood floors, preparing the wood floor for resin, the application process, and tips for maintaining resin-coated wood floors.
Whether you want to enhance the durability and aesthetic appeal of your wood floors or are simply curious about this unique flooring option, we’ve got you covered. Let’s get started!
What Is Resin?
Resin is a versatile material that can be used for a variety of applications, known for its ability to create a protective and decorative coating on various surfaces.
It is composed of polymer compounds that solidify into a durable layer when cured. This unique property makes it ideal for protecting surfaces from wear, impact, and chemical damage.
In the industrial sector, epoxy resin is widely used for adding a protective layer to floors, increasing their longevity and resistance to heavy foot traffic.
In the art world, artists use resin to achieve a glossy finish on paintings, giving them a professional and polished look.
What Are The Different Types Of Resin?
Resin comes in various types, each with unique characteristics and applications. Some common types of resin include epoxy resin, polyurethane resin, and polyester resin, each offering distinct features for different purposes.
Epoxy Resin
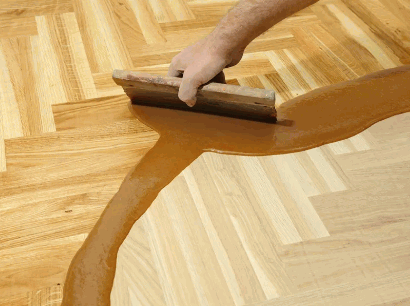
Epoxy resin is a popular choice for coating wooden floors due to its excellent adhesion properties and durability, providing a glossy and smooth finish that enhances the surface’s appearance.
One of the key benefits of epoxy resin in wooden floor applications is its ability to create a protective layer that shields the surface from scratches, stains, and moisture damage, ultimately prolonging the longevity of the flooring. The glossy finish achieved with epoxy resin not only adds a visually appealing touch to the wooden floors but also contributes to a brighter and more spacious feel in the room.
When applying epoxy resin to wooden floors, it is crucial to follow the recommended techniques for mixing, pouring, and spreading the resin evenly to ensure a seamless and professional-looking result.
Take a look: How To Install A Resin Floor In My Kitchen
Polyurethane Resin
Polyurethane resin is known for its protective properties, offering a durable and high-gloss finish that protects wooden floors from scratches, stains, and water damage.
This type of resin provides a strong barrier against wear and tear, making it ideal for high-traffic areas in homes or commercial spaces. Its ability to resist spills and moisture helps maintain the integrity of the wooden floor over time, preventing warping or discoloration.
Applying polyurethane resin involves thorough surface preparation, including sanding and cleaning the wooden floor to ensure a smooth application. Proper ventilation during the application process is crucial, allowing the resin to cure effectively and create a long-lasting, glossy seal. Regular maintenance, such as gentle cleaning and avoiding harsh chemicals, can help preserve the shine and protective qualities of the polyurethane finish.
Polyester Resin
Polyester resin offers a cost-effective solution for enhancing wood floors with a protective and decorative coating, providing a matte finish that revitalises the surface.
It is particularly favoured for its ability to not only enhance the aesthetics of wood floors but also provide long-lasting protection against wear and tear. One of the key advantages of using polyester resin on wood floors is its versatility in customisation, allowing homeowners to achieve their desired look. Whether you prefer a subtle matte finish or a glossy sheen, polyester resin can be tailored to meet your specific preferences. The application techniques for polyester resin on wood floors are relatively straightforward, making it accessible for DIY enthusiasts looking to upgrade their living spaces.
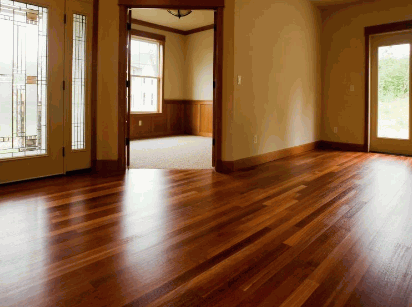
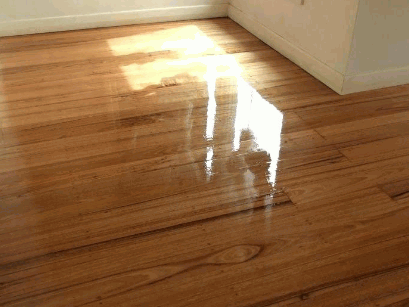
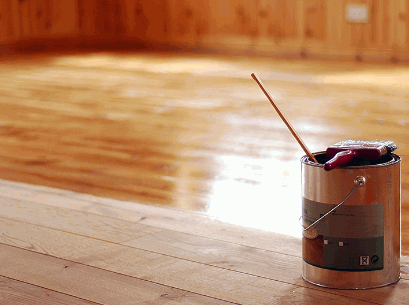
Can You Put Resin On Wood Floors?
Applying resin on wooden floors is a popular choice for enhancing their appearance and providing long-lasting protection against wear and tear.
Resin coating offers a seamless finish that not only showcases the natural beauty of wood but also adds a layer of robust protection. By creating a tough barrier, resin shields the wood from scratches, stains, moisture, and daily traffic, making it ideal for high-traffic areas. Resin is available in a variety of finishes, from glossy to matte, allowing for customisation to suit different décor styles. While the application process requires attention to detail and proper ventilation, the results are worth the effort in terms of both aesthetics and durability.
What Are The Benefits Of Putting Resin On Wood Floors?
Coating wood floors with resin offers numerous advantages, including enhanced protection, improved durability, and a sleek finish that enhances the surface appearance.
The application of resin on wood floors not only provides a strong shield against scratches, stains, and wear but also significantly prolongs the lifespan of the surface.
By creating a seamless protective layer, resin ensures that the wood is safeguarded from moisture damage and prevents fading due to sunlight exposure.
The glossy finish achieved through resin coating adds a touch of elegance and sophistication to the flooring, instantly transforming the overall aesthetic appeal of the space.
This combination of enhanced durability and visual enhancement makes resin coating a wise investment for anyone looking to elevate the look and longevity of their wood floors.
What Are The Risks Of Putting Resin On Wood Floors?
Whilst applying resin on wooden floors can yield beautiful results, there are risks involved, especially for DIY projects, related to improper application, curing, and hardening processes.
When it comes to DIY resin applications, one of the key challenges is ensuring the proper mixing of the resin and hardener. Incorrect ratios can lead to issues with curing and hardening, resulting in a sticky or uneven finish. To mitigate this risk, carefully follow the manufacturer’s instructions and use measuring tools to achieve the right mixture.
Controlling environmental factors such as temperature and humidity during the curing process is crucial for achieving a strong and durable bond between the resin and the wooden surface.
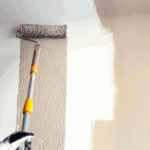
How To Prepare The Wood Floor For Resin?
Preparing a wood floor for resin application is crucial to ensure a smooth and durable finish, involving cleaning, sanding, and addressing any cracks or imperfections in the surface.
After thoroughly cleaning the wood floor to remove any debris or dirt, the next step involves sanding the surface to create a rough texture for better adhesion. Filling any cracks or gaps with an appropriate wood filler is essential to prevent the resin from seeping through. Ensuring that the surface is completely dry and free of any dust particles is vital in achieving optimal adhesion. Properly preparing the wood floor not only enhances the aesthetics of the final result but also extends the longevity of the resin coating.
Clean The Floor Thoroughly
Thoroughly cleaning the wood floor is the first step in preparing for resin application, ensuring that the surface is free from dust, dirt, and debris that could affect the coating’s adhesion and finish.
When it comes to cleaning a wood floor, using a vacuum with a soft brush attachment or a microfibre mop is recommended to remove loose particles and prevent scratching. For tougher stains, a mild detergent mixed with warm water can be gently applied. After cleaning, it’s essential to ensure the floor is completely dry before applying the resin to prevent any issues with the finish. Regular maintenance such as sweeping or gentle mopping with a damp cloth can help preserve the beauty and longevity of the wood floor post-application.
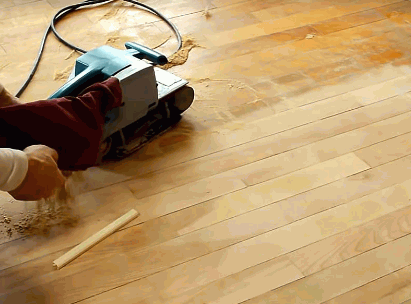
Sand The Floor
Sanding the wood floor is essential to create a smooth and level surface that promotes proper adhesion and enhances the overall finish of the resin coating.
This process involves using different grades of sandpaper to gradually remove imperfections, old finishes, and rough patches from the wood surface. By starting with a coarser grade to level any uneven areas and then progressing to finer grades for smoothing, a uniform, and ideal base can be achieved for the resin application. Proper sanding not only ensures a visually appealing result but also plays a crucial role in the durability and longevity of the final finish.
It is imperative to pay attention to detail during the sanding process to ensure that the floor is adequately prepared for the resin coating to adhere effectively.
Fill In Any Gaps Or Cracks
Addressing any gaps or cracks in the wood floor is essential before applying resin, as these imperfections can impact the coating’s adhesion and longevity, requiring proper repair and maintenance.
Filling gaps and cracks in the wood floor ensures a smooth resin application, creating a strong bond between the coating and the underlying surface. To achieve a seamless finish, it is necessary to employ effective repair techniques such as using wood fillers or epoxy putty to fill in the imperfections.
Regular maintenance of the wood floor, including addressing surface imperfections promptly, plays a vital role in preserving the durability of the resin coating. By identifying common floor issues early and utilising the right materials for repairs, homeowners can prolong the lifespan of their wood floors and maintain a beautiful, flawless finish.
Apply A Primer
Applying a primer on the wood floor serves as a crucial step in enhancing adhesion, improving compatibility with the resin coating, and ensuring a strong bond that enhances the overall longevity of the finish.
Primers play a fundamental role in preparing the wood surface for resin application by creating a smooth and uniform base that promotes better adherence to the coating. By filling in pores and imperfections, primers help to seal the wood, preventing any potential issues with the resin penetrating unevenly.
Proper selection of primers based on the specific characteristics of the wood and resin used is vital to achieve optimal results. Techniques such as thorough cleaning, sanding, and applying the primer evenly can significantly impact the final finish by ensuring optimal adhesion and compatibility.
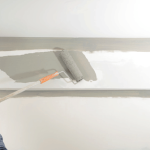
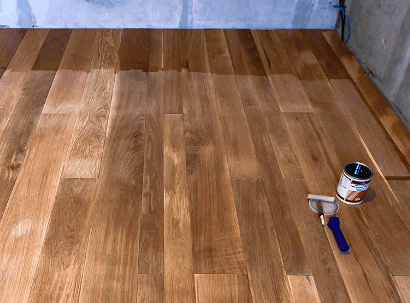
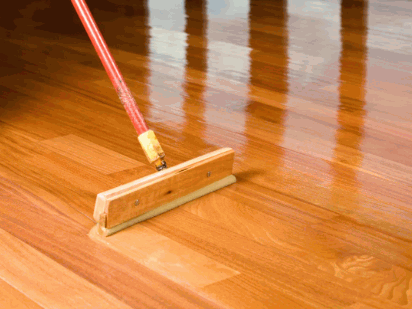
How To Apply Resin On Wood Floors?
Applying resin on wood floors requires precision and skill, involving specific techniques and steps to achieve a glossy and smooth finish that enhances the surface appearance.
One essential consideration when applying resin on wood floors is ensuring that the surface is properly prepared beforehand. This involves thorough cleaning and sanding to create a smooth and even base for the resin. The temperature and humidity of the environment must be taken into account to prevent any issues during the curing process.
When it comes to creating a uniform finish, applying multiple thin layers of resin is key to avoiding drips or uneven patches. The glossy finish not only adds a luxurious sheen to the floor but also acts as a protective layer, enhancing durability and longevity.
Choose The Right Resin
Selecting the appropriate resin for wood floor application is crucial, considering factors such as clarity, tint options, and UV protection to achieve the desired finish and durability.
When choosing a resin for your wood floors, it is essential to think about the level of clarity you desire in the final look. Clear resins can enhance the natural beauty of the wood, allowing its grain and patterns to shine through. On the other hand, tinted resin options provide a way to customise the appearance of your floors, whether you prefer a subtle hint of color or a bold statement. UV protection is key in preserving the finish and maintaining the color integrity over time, especially when exposed to sunlight.
Mix The Resin According To The Instructions
Properly mixing the resin according to manufacturer instructions is essential for achieving the desired curing and hardening process required for a durable and long-lasting finish on wooden floors.
When mixing resin for wooden floor application, it is crucial to pay attention to the recommended ratios of resin and hardener to ensure proper curing. Achieving the right consistency of the resin mixture is key as it directly impacts the application process. Thoroughly stir the components together, ensuring there are no visible streaks or unmixed areas. Once the resin is properly mixed, it must be applied promptly to the wooden surface to avoid premature hardening. Proper curing conditions, such as maintaining consistent temperature and humidity levels, are vital for allowing the resin to set and harden effectively.
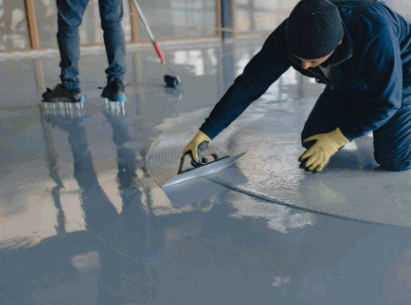
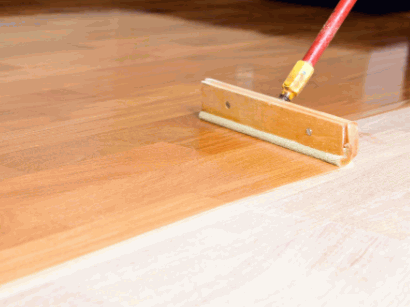
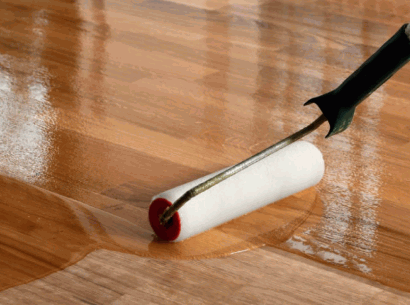
Apply The Resin In Thin Layers
Applying resin in thin layers on wooden floors is essential to prevent issues such as bubbling, pooling, or uneven drying, ensuring a smooth and flawless finish.
By applying resin in thin layers, you create a more controlled environment that allows for proper curing without the formation of unsightly bubbles. This technique also helps in preventing pooling, where excess resin accumulates in certain areas, leading to an uneven distribution.
A key aspect of achieving a uniform application is maintaining a consistent pour rate and using a smooth, steady hand during the process. Applying thin layers ensures quicker and more even drying, reducing the risk of surface imperfections and promoting a professional-looking final finish.
Use A Blowtorch To Remove Bubbles
Using a blowtorch to remove bubbles from the resin coating on wood floors helps achieve a flawless finish by eliminating trapped air pockets, puddling, or drips that can affect the overall appearance.
This technique involves carefully moving the blowtorch over the resin surface, causing the bubbles to dissipate as the heat expands the air inside them. Properly using a blowtorch not only removes bubbles but also helps prevent surface defects. It’s crucial to maintain a safe distance between the flame and the resin to avoid overheating or scorching.
The controlled heat application leaves behind a smooth, uniform surface free of imperfections, making it ideal for high-quality finishes on wood floors. Mastering this bubble removal method can greatly enhance the final appearance of resin coatings.
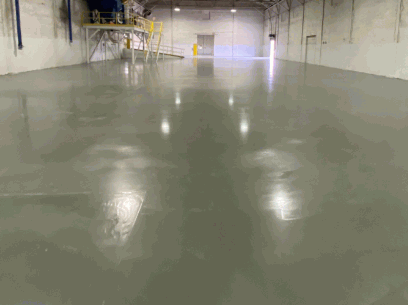
How To Maintain Resin Coated Wood Floors?
Maintaining resin-coated wooden floors involves regular cleaning, repair of any damages, and occasional refinishing to preserve the protective layer and aesthetic appeal, especially for indoor use.
Cleaning resin-coated wooden floors should be done by sweeping or vacuuming regularly to remove dirt and debris that can scratch the surface. For spills, gently dab them up immediately to prevent staining. When it comes to repairing damages, consider using wood filler for small cracks or gouges and sanding for larger areas. Refinishing options include recoating the floor with a fresh layer of resin or opting for a completely new finish for a different look. By staying proactive with maintenance, you can extend the lifespan of your resin-coated wooden floors and keep them looking their best.