Window sills may often be overlooked when it comes to cleaning, but they play a crucial role in maintaining the overall cleanliness and appearance of your home.
We will explore why cleaning window sills is important, the benefits of keeping them clean, the tools and supplies needed for the job, the best cleaning solutions to use, and the essential steps for cleaning different types of window sills.
We will also discuss how to maintain clean window sills to ensure they stay in top condition.
Let’s dive in and learn how to achieve sparkling clean window sills!
Why Is Cleaning Window Sills Important?
Cleaning window ledges is important because it helps prevent the build-up of mould and dirt, ensuring a healthier living environment. Regular cleaning removes contaminants that can contribute to allergies and respiratory issues, and it preserves the aesthetic and structural integrity of your window ledges.
Learn more: How To Clean Window With Screen
What Are The Benefits Of Cleaning Window Sills?
Cleaning window sills offers numerous benefits including the prevention of mould growth, reduction of dirt and allergens, and extending the lifespan of the window sills.
By ensuring that window sills are kept clean, one can significantly improve indoor air quality by reducing allergens that can accumulate in the dust and grime. This not only benefits those with allergies but also promotes a healthier living environment for everyone in the household.
In addition, regular cleaning prevents the build-up of mould, which can not only be unsightly but also detrimental to one’s health. Well-maintained window sills contribute to the overall aesthetics of a room, enhancing its appearance and making the space more inviting.
Clean window sills facilitate the smooth operation of windows, ensuring that they open and close effortlessly. This maintenance helps extend the lifespan of the windows themselves, saving on potential repair or replacement costs in the long run.
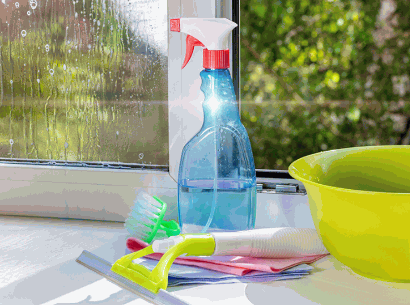
What Tools And Supplies Are Needed To Clean Window Sills?
To effectively clean window sills, you need a range of tools and supplies including:
- a cleaning toothbrush,
- a microfibre cloth,
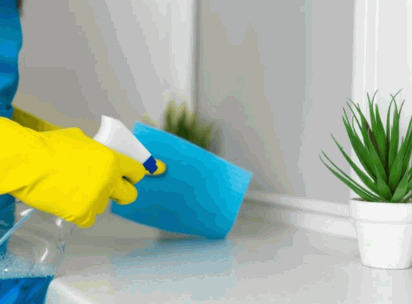
- a spray bottle,
- rubber gloves, and
- a dust mask.
These tools help ensure a thorough and safe cleaning process, protecting both you and the materials of your window sills.
What Are The Best Cleaning Solutions For Window Sills?
The best cleaning solutions for window sills include bleach water, white vinegar, and hydrochloric acid, each tailored to deal with specific types of stains and buildup.
In terms of using bleach water, it is effective in killing mould and mildew spores, making it ideal for combating fungal growth on window sills. The solution should be diluted in water following the recommended ratio to avoid damaging the surface and to ensure safety during application.
On the other hand, white vinegar is an excellent natural cleaner that can dissolve mineral deposits and soap scum without harsh chemicals. It is particularly useful for tackling hard water stains and grease buildup on window sills. Diluting white vinegar with water creates a gentle yet potent cleaning solution.
For stubborn stains like rust or mineral build-up, hydrochloric acid can be a powerful solution. Extreme caution must be exercised when handling hydrochloric acid due to its corrosive nature. Proper protective gear, ventilation, and accurate dilution ratios are crucial to prevent accidents and ensure effective cleaning results.
What Are The Essential Tools For Cleaning Window Sills?
Essential tools for cleaning window sills include a cleaning toothbrush for scrubbing, a microfibre cloth for wiping, and a spray bottle for applying cleaning solutions.
Each of these tools plays a vital role in ensuring a thorough cleaning process. The cleaning toothbrush is perfect for reaching tight corners and crevices where dirt and grime tend to accumulate, allowing you to scrub away even the toughest stains with precision.
The microfibre cloth, known for its exceptional ability to attract and trap dust and dirt particles, ensures a streak-free finish, leaving your window sill sparkling clean.
The spray bottle, when filled with a suitable cleaning solution, helps to loosen stubborn debris and grime, making it easier to wipe away with the microfibre cloth. To use these tools effectively, start by dusting off loose dirt with the brush, then spray the cleaning solution and wipe it off with the cloth, ensuring you cover all areas thoroughly.
How To Clean Different Types Of Window Sills?
Cleaning various types of window sills, such as wooden, vinyl, metal, and sandstone, requires different approaches and cleaning solutions to ensure the material is not damaged while achieving optimum cleanliness.
Wooden Window Sills
When cleaning wooden window sills, it is best to use a mild vinegar solution to avoid damaging the wood while effectively removing dirt and mold.
- Begin by mixing equal parts of white vinegar and warm water in a spray bottle. Lightly mist the solution onto the window sill surface.
- Using a soft cloth or sponge, gently scrub the area in circular motions to lift away any grime or built-up residue without scratching the wood.
- Once you have thoroughly cleaned the wooden window sill, dampen a fresh cloth with plain water and wipe down the surface to remove any remaining vinegar solution.

Vinyl Window Sills
Vinyl window sills can be cleaned using a solution of bleach water to remove mould and dirt effectively without causing any damage to the material.
When cleaning vinyl window sills, it’s important to rinse the area thoroughly after using the bleach solution. This will help to ensure that no residue is left behind, which could potentially cause damage over time. To start the cleaning process, mix a solution of one part bleach to four parts water in a bucket.
Dip a clean sponge or cloth into the solution and gently scrub the window sills, focusing on any areas with visible mould or dirt buildup. Take care not to oversaturate the vinyl, as excess moisture can lead to warping or discolouration.

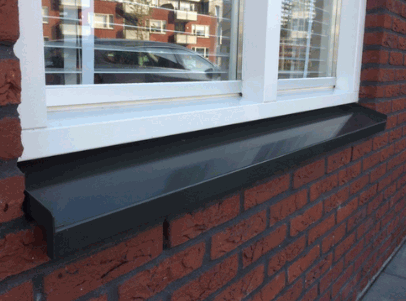
Metal Window Sills
For metal window sills, a diluted solution of hydrochloric acid can be used to tackle stubborn stains and rust effectively.
Despite its strong cleaning properties, bear in mind that hydrochloric acid can be hazardous if not handled properly. To start, ensure to wear protective gear such as gloves, goggles, and a mask to avoid any direct contact or inhalation of fumes.
- Before application, always dilute the acid with water following the recommended ratio provided by the manufacturer to prevent damage to the metal surface. Typically, a ratio of 1 part acid to 10 parts water is ideal.
- Once the solution is ready, apply it to the stained areas, taking care not to oversaturate or allow it to sit for too long. Afterward, rinse the sills thoroughly with clean water to remove all traces of the acid.
- Ensure that the metal window sills are dried completely to prevent any corrosion from occurring. This step is crucial in maintaining the integrity and appearance of the metal surfaces over time.
What Are The Steps To Clean Window Sills?
- Removing debris and dust
- Wiping down the sill
- Scrubbing away stubborn stains
- Drying the sill to prevent mould buildup and ensure a clean surface
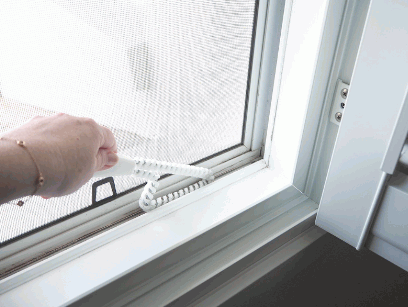
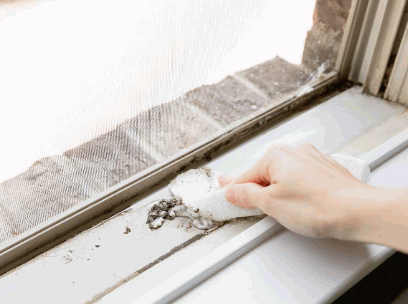
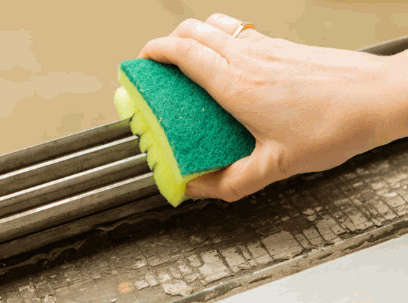
Removing Debris And Dust
Start by removing debris and dust from the window sill using a cleaning toothbrush or a small brush to reach into corners and crevices. Thoroughly removing all loose dirt and debris before applying any cleaning solutions is crucial for achieving effective results. Not only does this step ensure a cleaner finish, but it also helps prevent streaking and smudging during the cleaning process. By using a cleaning toothbrush or a small brush, you can access those hard-to-reach areas and eliminate buildup that may have accumulated over time. When using a cleaning toothbrush, start by gently scrubbing the surface in circular motions to dislodge dirt and grime. Pay special attention to corners and edges where dirt tends to collect. Be sure to rinse the brush frequently to avoid redistributing dirt back onto the window sill.
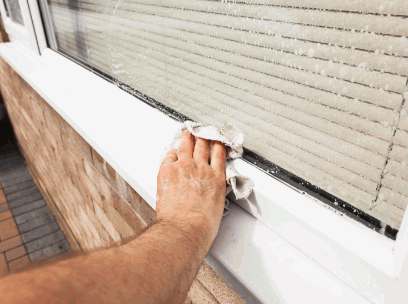
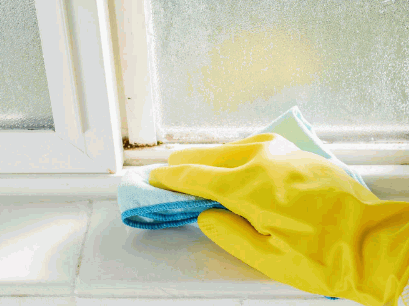
Wiping Down The Sill
Wipe down the window sill with a microfibre cloth and a spray bottle filled with an appropriate cleaning solution to remove surface dirt and grime.
This method not only effectively removes dust and grime accumulated on the window sill but also significantly reduces the chances of streaks or residue left behind. The microfibre cloth is essential for this task as its tightly woven fibres are excellent at trapping and lifting dirt without spreading it around.
When using the spray bottle, ensure to hold it about 6-8 inches away from the surface and mist the cleaning solution evenly to cover the entire area. This helps in achieving a thorough and uniform cleaning result.
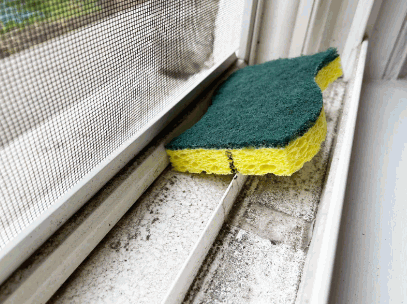
Scrubbing Away Stubborn Stains
Scrub away stubborn stains on the window sill using a brush and a paste made from bicarbonate of soda and water, which can help eliminate mould and ingrained dirt.
To create the bicarbonate of soda paste, simply mix a small amount of bicarbonate of soda with water to form a thick consistency. Use a brush or a sponge to apply the paste onto the window sill. Remember to gently scrub the surface in circular motions, focusing on the areas with the most stubborn stains. The gentle scrubbing action will help loosen the dirt without causing any damage to the surface.
Drying The Sill
Dry the window sill thoroughly with a clean cloth to prevent mould buildup and ensure that no moisture is left behind.
After wiping the window sill, it’s important to pay special attention to the corners and edges where water tends to accumulate. Along with using a clean cloth, you can also use a microfibre cloth for better absorption of moisture. Make sure to wring out the cloth regularly to prevent spreading moisture back onto the surface. Once you have wiped the entire sill, leave the windows open for a while to allow any residual moisture to evaporate naturally.

How To Maintain Clean Window Sills?
Maintaining clean window ledges involves following a regular cleaning schedule, preventing dust and debris build-up, and promptly repairing any damage to the window ledges.
Regular Cleaning Schedule
Establishing a regular cleaning schedule for your window sills ensures that dirt and mould do not have the chance to accumulate and cause problems.
Experts recommend cleaning window sills at least once a month to keep them in top condition. You can easily incorporate this task into your regular cleaning routine by allocating time specifically for it. Try using a damp cloth or a solution of water and mild detergent to wipe down the sills, paying extra attention to the corners where dust tends to collect. Consider vacuuming any debris before wiping to ensure a thorough clean.
Preventing Dust And Debris Buildup
Preventing dust and debris build-up on window sills can be achieved by using effective cleaning products and practicing regular maintenance.
One recommended cleaning product for window sills is an all-purpose cleaner that can effectively break down and remove dirt, dust, and grime. Make sure to choose a cleaner that is suitable for the material of your window sills, whether they are wood, vinyl, or metal.
Implementing a daily dusting routine with a microfiber cloth can help prevent build-up before it becomes noticeable. For stubborn stains, consider using a gentle abrasive cleaner, but always test it on a small, inconspicuous area first to avoid damaging the surface.
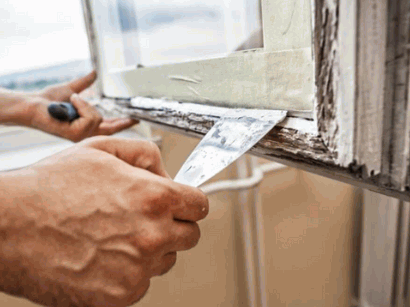
Repairing Any Damage
Repairing any damage to window sills promptly is essential to maintain their integrity and appearance while preventing further issues during cleaning.
In terms of identifying damage, look for signs such as cracks, water stains, or soft spots. These could indicate structural issues that need immediate attention.
For common types of damage like rot, a thorough inspection is crucial to determine the extent of the problem. To repair minor rot, scrape off the damaged wood, apply wood hardener, fill it with epoxy, and sand it smooth.
If the sill is sagging or uneven, it may need additional support or replacement. In such cases, it’s best to consult a professional for proper assessment and repair.